
In this topic, we discuss mail protocol and how to send email using mail library and how can we sent an email with more dynamic and with some more graphical interface and it's really looking good than the traditional email content. Here we use FTL to make email a more graphical experience. We try to show the example of this topic as possible as an easy way. so without wasting any time let's start the topic.
WHAT IS FTL AND WHAT'S THE BENEFITS?
FTL(Free marker template) is a Java-based template language which is used to make the more dynamic and graphical experience on screen. FTL discovered by Apache foundation. It focuses on java based dynamic template design. Free marker template file extension is .ftl which is approx. as same as HTML code but the major difference is, we can send the data from Java source classes to show dynamic content. It's the main focus on MVC architecture which helps in separating web pages designer from the developer. The designer won't face difficulties because of the complex business. Let's see how it separate logic and designing code with a simple example.
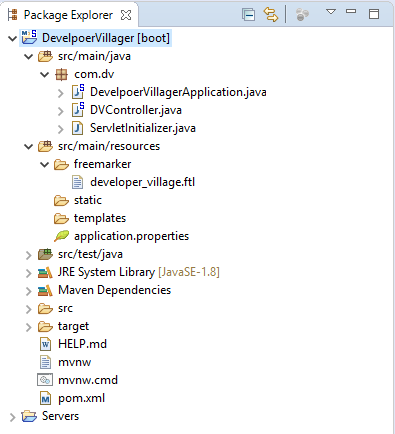
PROJECT STRUCTURE:
MAVEN DEPENDENCIES:
Put this dependencies in pom.xml file.
<dependency>
<groupId>org.springframework.boot</groupId>
<artifactId>spring-boot-starter-mail</artifactId>
</dependency>
<dependency>
<groupId>javax.mail</groupId>
<artifactId>javax.mail-api</artifactId>
</dependency>
<dependency>
<groupId>org.freemarker</groupId>
<artifactId>freemarker</artifactId>
</dependency>
developer_village.ftl
<html>
<head>
<title>DEVELOPER VILLAGE</title>
<style>
body{
font-family: -apple-system, BlinkMacSystemFont, 'Segoe UI', Roboto, sans-serif;
margin:0px;
}
.absWrapper{
width:100%;
margin:0px auto;
background:#f4f4f4;
color:#050505;
}
.contentclass{
width:100%;
margin:0px auto;
height:auto;
font-size: 13px;
/*color:#1b3a55;
border-left: 1px solid #1b3a55;
border-right: 1px solid #1b3a55;
border-radius: 6px;
border:1px solid #f4dbdb;*/
padding:11px;
}
p{
margin:6px 0 6px 0;
}
</style>
</head>
<body>
<div class="absWrapper">
<div style="width:auto;background:#1e1f26; padding:0 0 0 10px;">
<div style="text-align:center;">
<a href="" style="text-decoration: none;padding: 0 0 0 0px;" target="_blank" rel="noopener noreferrer">
<h1 style="color:white;font-size:60px;">${header}</h1>
</a>
</div>
<div style="clear:both;"></div>
</div>
<div style="clear:both;"></div>
<div class="contentclass" style="background:##f4f4f4;">
<div>
<div style="margin-left: 10px;">
<p style="margin-top:0px;">Dear ${userName},</p>
<br/>
<p>
${message}
<br/>
</p>
<br>
<div>Best Wishes From,</div>
<div style="font-weight:bold;">DEVELOPER <span style="font-weight: bold;">VILLAGE</span></div>
</div>
<br>
</div>
<div style="clear:both;"></div>
</div>
<div style="background: #4d6448d; width:100%;margin:0px auto; text-align:center; padding:3px 0 3px 0;">
<h3 style="color:#087380;">DEVELOPER <span style="font-weight: normal;">VILLAGE</span></h3>
</div>
</body>
</html>
To set the data dynamically in ftl file we must declare the variable in ${variable name} type of syntax. It works like the key. That variable name should be the same in java class from which we send the data to ftl. How to send data we see below.
DevelpoerVillagerApplication .java
package com.dv;
import org.springframework.boot.SpringApplication;
import org.springframework.boot.autoconfigure.SpringBootApplication;
@SpringBootApplication(scanBasePackages = { "com.dv"})
public class DevelpoerVillagerApplication {
public static void main(String[] args) {
SpringApplication.run(DevelpoerVillagerApplication.class, args);
}
}
In the main class just add the package name, in which your all class are present which is execute on run time.
DVController.java
package com.dv;
import java.util.HashMap;
import java.util.Map;
import java.util.Properties;
import org.slf4j.Logger;
import org.slf4j.LoggerFactory;
import org.springframework.ui.freemarker.FreeMarkerTemplateUtils;
import org.springframework.web.bind.annotation.RequestMapping;
import org.springframework.web.bind.annotation.RequestMethod;
import org.springframework.web.bind.annotation.RestController;
import freemarker.template.Configuration;
import freemarker.template.Template;
import javax.mail.Message;
import javax.mail.PasswordAuthentication;
import javax.mail.Session;
import javax.mail.Transport;
import javax.mail.internet.InternetAddress;
import javax.mail.internet.MimeMessage;
import org.springframework.beans.factory.annotation.Autowired;
@RestController
public class DVController {
//Autowired Configuration class to get instance
@Autowired
private Configuration freemarkerConfig;
private static Logger logger = LoggerFactory.getLogger(DVController.class);
private String host = "SMTP sever address";
private Integer port = SMTP server port number;
private String userName = "Your user name";
private String password = "Your account password";
public Session createSMTPServerSession() throws Exception {
Properties props = new Properties();
props.put("mail.smtp.host", host);
props.put("mail.smtp.port", port);
props.put("mail.smtp.auth", "true");
// SSL SECURITIES CERTIFICATION
props.put("mail.smtp.startssl.enable", "true");
props.put("mail.smtp.socketFactory.class", "javax.net.ssl.SSLSocketFactory");
props.setProperty("mail.smtp.ssl.enable", "true");
props.setProperty("mail.smtp.ssl.required", "true");
// Create the connection session after authentication
Session session = Session.getDefaultInstance(props, new javax.mail.Authenticator() {
protected PasswordAuthentication getPasswordAuthentication() {
return new PasswordAuthentication(userName, password);
}
});
return session;
}
@RequestMapping(method=RequestMethod.GET,value="sendemail")
public boolean sentMail() throws Exception {
//Get session connection
Session session = createSMTPServerSession();
//Create MimeMessage instance for communication
MimeMessage message = new MimeMessage(session);
//Set User Name in which id the email sent to client
message.setFrom(new InternetAddress(userName));
//Get the instance from autowired variable and load the template in instance and set the path where ftl file available
freemarkerConfig.setClassForTemplateLoading(this.getClass(), "/freemarker");
//Create a map object and set the data which is send dynamically to the FTL template file
Map<String, String> ftlProperties = new HashMap<String,String>();
ftlProperties.put("header", "DEVELOPER VILLAGE");
ftlProperties.put("userName", "Developer village");
ftlProperties.put("message", "This is the testing ftl from message developer village email.");
//Instance the FTL file with the name
Template t = freemarkerConfig.getTemplate("developer_village.ftl");
//Set the FTL properties
String text = FreeMarkerTemplateUtils.processTemplateIntoString(t,ftlProperties);
message.addRecipient(Message.RecipientType.TO, new InternetAddress("Write the email address,want to send email"));
//Set the email type in this case it's html syntax
message.setContent(text, "text/html");
//Set the email header
message.setSubject("Testing email from Developer Village.");
Transport.send(message);
return true;
}
}
In above class,createSMTPServerSession() method is authenticate your given user id,after authentication create a session connection and return that session to sentMail() method to send email.In that createSMTPServerSession() method we set the properties details and SSL certification.
In sendMail() method first get the session and create the MimeMessage instance. In MimeMessage properties we set in which user id we want to send email to the client. Then get the instance of Configuration class and set the Free marker template classpath for loading. Then for sending the dynamic data to the FTL file initialize a Map<String, String> to set the data and transfer to the FTL file. Map key name is same as we declare the variable in FTL file.
Template t = freemarkerConfig.getTemplate("developer_village.ftl");
String text = FreeMarkerTemplateUtils.processTemplateIntoString(t,ftlProperties);
In this, we set the FTL file name and set the FTL properties and generate the full content of the FTL file. Then set this FTL string to MimeMessage and content type set to be "text\html". Transport.send(message); method capable to send the email to client-server.
OUTPUT:

Thank you for the post
ReplyDelete